
How to Use AI Story Generator to Craft Your Next Story Book

Ever sit staring at a blank screen, waiting for inspiration to strike? I know that solitary battle against writer's block all too well, but writing a story/book does not have to feel like pulling teeth anymore. With our powerful AI story generator, you can transform a single, raw concept into a structured, full-length narrative in minutes.
However, I quickly learned that getting a machine to write high-quality prose requires more than just typing "write a sci-fi story" into a prompt box. If you want vivid character development, precise pacing, and unpredictable plot twists, you have to know how to guide the algorithm.
In this step-by-step guide, we will walk through exactly how to configure your AI backend, fine-tune narrative perspectives, select the perfect writing persona, and ultimately generate a copy-ready manuscript draft that reads as if a seasoned novelist crafted it.
Table of Contents

Step 1: Select Your AI Brain (LLM Backend)
Think of the LLM (Large Language Model) as the creative brain power behind your story. You have two excellent choices: Gemini and Groq.
Gemini: Great for deep creativity, rich description, and nuanced character development.
Groq: Lightning-fast generation, perfect if you want to experiment quickly with different ideas.
🔘 What to do: Simply click the radio button next to your preferred AI engine to lock in your choice.

Step 2: Choose Your Writing Persona or Book Genre
Before the AI starts writing, it needs to know what "mask" to wear. Choosing a genre or persona instantly trains the AI on the pacing, language, and tropes of that specific style.
🔽 What to do: Click the dropdown menu and select the creative writer persona that matches your project.
Here is a quick look at the available personas you can choose from and when to use them:
Persona | Best Used For... |
Award-Winning Science Fiction Author | Mind-bending tech, space operas, or dystopian futures. |
Historical Fiction Author | Stories grounded in real past eras with accurate period details. |
Fantasy World Builder | Epic journeys, magic systems, mythical creatures, and lore. |
Mystery Novelist | Detective stories, noir, thrillers, crime drama, and puzzles. |
Romantic Poet | Emotional depth, relationship dynamics, and lyrical prose. |
Thriller Writer | High-stakes action, fast pacing, and intense suspense. |
Children's Book Author | Whimsical, light-hearted language tailored for younger readers. |
Satirical Humorist | Witty comedy, social commentary, parody, and playful sarcasm. |
Biographical Writer | Life stories, realistic character profiles, and reflective memoirs. |
Dystopian Visionary | Grim futures, oppressive regimes, and survival against the odds. |
Magical Realism Author | Grounded, real-world settings infused with subtle, dreamlike magic. |

Step 3: Type Your Story Setting
The setting is the canvas of your story. It tells the AI exactly where and when the action takes place. Instead of just writing a single word, give the AI a little atmosphere to work with!
Basic Example: A spaceship.
Pro-Level Example: A decaying, neon-lit cyberpunk city in London, heavily battered by constant acid rain.
✍️ What to do: Click into the text input box and type out your location. The more descriptive you are, the more vivid the AI's opening scenes will be.

Step 4: Describe the Story's Main Characters
A story is only as good as its characters. In this section, you introduce the AI to your protagonist (and antagonist, if you have one). Don't just list names - give them a defining trait or a hidden motive. To get the best results, use this simple formula when filling out the character box:
👤 The Character Formula: > [Name] — [Role in the Story] — [Distinct Flaw, Quirk, or Visual Detail]
Example to follow:
Arthur — The Protagonist — A cynical, retired detective who carries a mysterious mechanical pocket watch that ticks backwards.
Vance — The Antagonist — A corrupt tech-mogul with a pristine silver prosthetic arm and a habit of never looking people in the eye.
👤 What to do: Type in your character details into the text input box using the formula above. Giving them a unique quirk helps the AI naturally weave those traits into the dialogue and action later on.

Step 5: Enter Your Core Plot Elements
This is where you give the AI the roadmap for the story. Without plot elements, the AI might wander. Focus on three major ingredients: the theme, a key event, and the main conflict. Example layout:
Theme: Betrayal and survival.
Key Event: A secret capsule is stolen from the governor's vault.
Main Conflict: The protagonist must find the capsule before a bounty hunter tracks them down.
🗺️ What to do: Type your plot points into the text box. Think of these as the absolute "must-happen" moments you want the AI to include in the draft.

Step 6: Select Your Writing Style
The writing style dictates the overall flavor and structure of the sentences. It's how your story "sounds" to the reader.
Formal: Uses sophisticated vocabulary and complex sentence structures. Great for epic fantasies or serious historical fiction.
Casual: Conversational, relaxed, and modern. Perfect for contemporary fiction or light-hearted adventures.
Poetic: Lyrical, deeply descriptive, and rich with metaphors. Best for emotional or dreamlike scenes.
Humorous: Light, witty, and punchy. Great if you want to keep your readers smiling.
🔽 What to do: Click the dropdown menu and select the style that matches the voice you want for your narrative.

Step 7: Select Story Tone
If style is how the story is told, tone is the emotional vibe it gives off. Changing the tone will completely shift the mood of the generation.
Dark: Focuses on grim, mysterious, or high-stakes themes.
Uplifting: Inspiring, hopeful, and positive.
Suspenseful: Keeps readers on the edge of their seats with tension and mystery.
Whimsical: Playful, imaginative, and light-hearted.
🎨 What to do: Choose a tone from the dropdown menu to set the emotional background music for your chapter.

Step 8: Select Your Narrative Point of View (POV)
The point of view determines who is telling the story and how much access the reader has to the characters' inner thoughts.
First Person (I/We): The story is told directly by a character. Extremely intimate, making the reader feel like they are walking in the protagonist's shoes.
Third Person Limited (He/She/They): The narrator sits outside the story but closely follows just one character's thoughts and actions.
Third Person Omniscient (All-Knowing): The narrator knows everything about all characters and events, moving freely between different perspectives.
👁️ What to do: Pick your perspective from the dropdown menu based on how close you want your reader to be to the characters.

Step 9: Select the Target Audience Age Group
AI models adapt their complexity based on who is reading. Choosing the right age group prevents the AI from using vocabulary that is too advanced or concepts that are too simple.
Children: Use simple language, shorter sentences, and focus on highly visual, engaging concepts.
Young Adults: Tailored for teens, featuring relatable themes, dynamic pacing, and intermediate vocabulary.
Adults: Unlock complex themes, sophisticated vocabulary, and nuanced character psychology.
👥 What to do: Click the dropdown menu and select the age range of your ideal reader.

Step 10: Select Story Content Rating
Just like movies, your story needs a maturity rating. This acts as a safety guardrail for the AI, ensuring the generated content aligns with the boundaries you want.
G: General audiences. Completely clean, safe, and family-friendly.
PG / PG-13: Contains mild action, suspense, or mature themes without crossing into explicit territory.
R: Restricted. Allows the AI to explore much greater, high-stakes, violent, or intensely mature scenarios.
🛑 What to do: Drop down the menu and choose the rating that fits the maturity level of your plot.

Step 11: Select Your Story Conclusion Style
Every great story needs an unforgettable ending. This setting tells the AI exactly how to wrap up the narrative arcs you've built.
Happy: Ties up loose ends with a positive, satisfying resolution where the heroes win.
Tragic: Delivers an emotional, heartbreaking ending where things don't go as planned.
Cliffhanger: Ends on a high-stakes moment of suspense, leaving the reader begging for a sequel.
Twist: Pulls the rug out from under the reader with a shocking, unexpected final revelation.
🏁 What to do: Choose your preferred ending style from the dropdown menu to guide how the final pages unfold.

Step 12: Set Your Story Length
You don't have to guess how long your draft will be. The tool features a simple slider that lets you dial in the exact scale of your generation.
Short Snippets (1–3 pages): Perfect for quick scene testing, flash fiction, or experimenting with prompt ideas.
Full Chapters (4–10 pages): Ideal for generating deep, immersive narrative blocks with full character interactions.
🎚️ What to do: Click and drag the slider button left or right to select your desired number of pages (from 1 to 10).

Step 13: Fire Up the Generator!
You’ve chosen your AI brain, crafted your setting, introduced your characters, and locked in your stylistic preferences. Now it’s time to watch the magic happen.
🚀 What to do: Double-check your settings, scroll to the bottom, and click the bright "AI, Write a Story" button.
The AI will immediately begin processing your roadmap and weaving your creative choices into a beautifully formatted draft. Give it a minute to think, grab a coffee, and get ready to read your brand-new story!

What Happens Next? Reading and Exporting Your AI Story
Once you click "AI, Write a Story", the tool goes to work behind the scenes. Instead of leaving you waiting in the dark, the interface updates in real-time to show you its structural thought process across four distinct stages:
1. The Generated Premise
First, the AI spits out a foundational premise. This is a condensed, high-level summary of the narrative arc based on your inputs. It serves as the ultimate sanity check to ensure the AI understands your setting, characters, and core conflict before expanding it into full pages.

2. The Structural Outline
Next, you will see a detailed story outline pop up. The tool maps out the pacing, scene breakdowns, and narrative beats chapter by chapter. This acts as the skeletal framework holding your entire draft together.

3. Your Completed Story
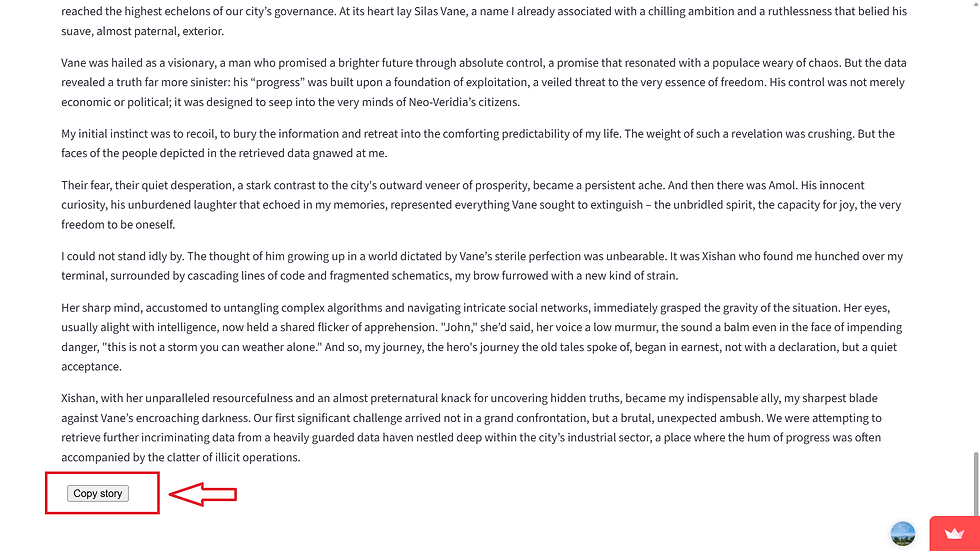
This is where the magic truly comes alive. The AI fleshes out the outline, delivering your full, immersive story draft. Complete with rich descriptions, dialogue matching your chosen persona, and the exact conclusion style you requested, your story will stream directly onto the screen.

4. One-Click Copy & Export
You don't need to manually click and drag to highlight pages of text. At the very bottom of the generated piece, you'll find a dedicated "Copy Story" button. Clicking this instantly saves the entire piece to your clipboard, making it effortless to paste into Microsoft Word, Google Docs, or your preferred editing software.
📋 What to do: Scroll to the bottom of your freshly written tale and click the Copy Story button to take your draft wherever you want to edit or publish it next!
Try It Yourself Now!
Don't let your story ideas just sit in your head. Head over to our AI Story Generator dashboard right now, follow the steps we just covered, and generate your very first chapter draft today.
Over to You: Which writing persona are you going to experiment with first? The Dystopian Visionary or the Award-Winning Science Fiction Author? Let us know your favorite setups in the comments below!


Comments